
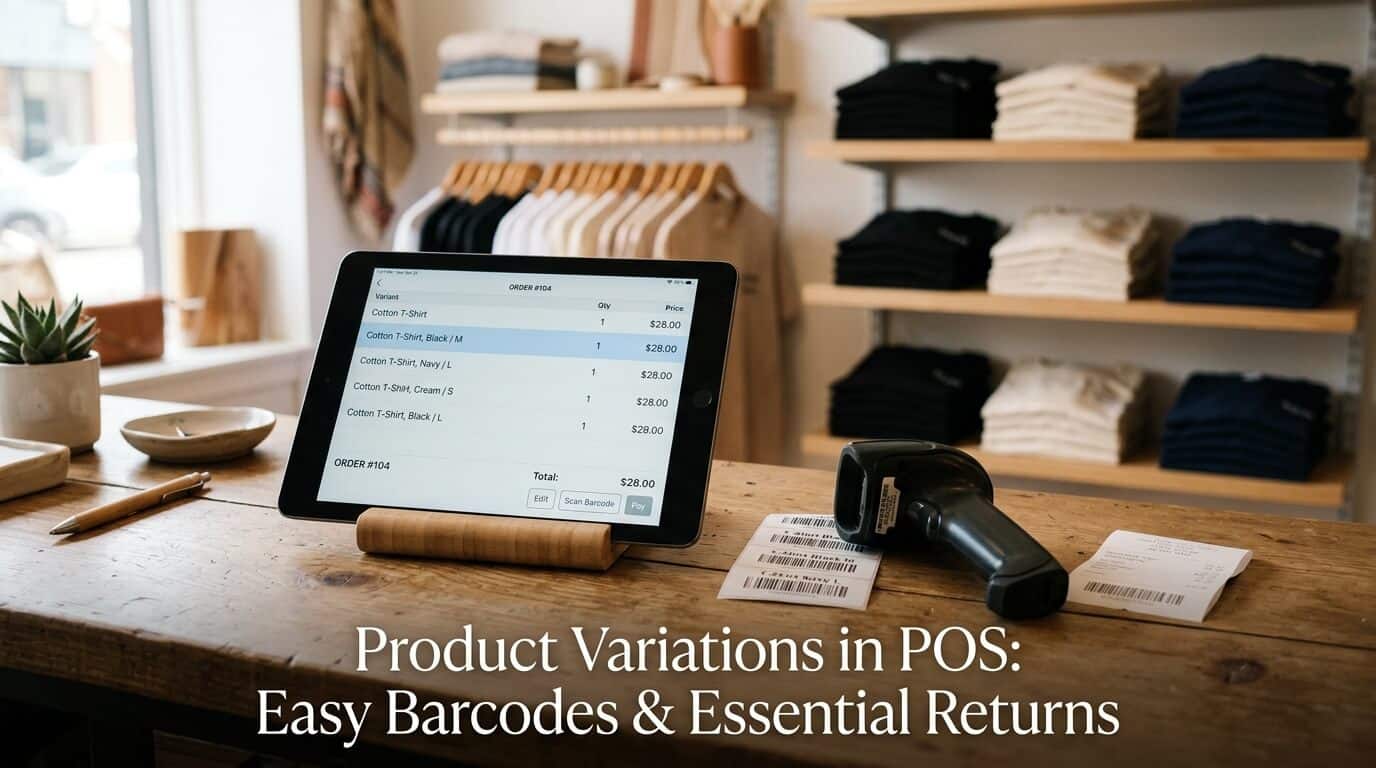
A shirt that comes in four sizes and three colors is not one product. It is twelve items that look alike, sell at different speeds and need separate stock counts. If your store sells in person and online, each of those twelve items also needs its own barcode and its own return record. Product variations in POS are where this either works or quietly goes wrong.
The usual failures are easy to recognize. A label prints the same barcode for every size, so the scanner adds the wrong item. A customer returns a medium, the refund restocks a large, and nobody notices until a shelf count does not match the screen. These are not hardware faults. They come from how the variations were set up before they reached the register.
This guide covers three connected jobs: how to organize product variations in POS, how to print barcode labels that scan to the correct variation, and how to process returns so stock and cash records stay accurate. It is written for owners and managers of small retail stores that run on WooCommerce, where WooCommerce product variations are the starting point for everything else. The examples use Vitepos, a point of sale plugin for WooCommerce. Every Vitepos feature mentioned comes from its documentation, feature pages or published change log, and the places where you should check your own version are marked.
Quick answer
- For product variations in POS, give every sellable variation its own SKU, price and stock count in WooCommerce before it reaches the register.
- Choose one value for the barcode (the SKU or the product ID) and use it for every label.
- Print POS barcode labels per variation, not per parent product, and test-scan one label before printing a full batch.
- Process every return against the original order so the refund, the stock change and the cash drawer record all point to the same variation.
- Treat POS inventory management as a schedule: review variation stock and returns on fixed days, not only when a count looks wrong.
Why Product Variations, Barcode Labels and Returns Belong Together
On a to-do list these three tasks look separate. In practice they depend on one piece of data: the identifier of a single variation. The variation record holds it, the label prints it, the scanner reads it, the sale stores it and the return looks it up again. If the identifier is wrong at any point, every later step inherits the error.
| Step | What must be true | What breaks if it is not |
|---|---|---|
| Variation record | Each size and color has its own SKU, price and stock count | Wrong price at checkout or shared stock across sizes |
| Barcode label | The barcode encodes a value that is unique to that variation | Two sizes scan as the same item |
| Scan at checkout | The scan resolves to exactly one variation | Cashiers search by name and pick by hand, which invites mistakes |
| Sale record | The order stores the variation that was sold | A later return cannot be matched to the right item |
| Return | The refund and the stock change apply to the variation that was sold | Stock and cash drawer records drift apart |
Because the chain is only as strong as its weakest link, the order of work matters when you set up product variations in POS. Fix the variation data first, print labels second and set return rules third. The rest of this article follows that order.
Part 1: How to Organize Product Variations in POS
What a Variation Is and How WooCommerce Stores It
WooCommerce uses a “variable product” for anything sold in options such as size or color. The variable product is the parent. Each combination of options is a variation, which is why WooCommerce product variations are the unit your POS sells. According to the WooCommerce documentation on variable products, each variation can have its own image, SKU, GTIN/UPC/EAN/ISBN value, regular and sale price, weight, dimensions, shipping class, tax class and stock settings.
A POS reads this same data. That is the main point to remember about product variations in POS: the register does not create anything new. If a variation lacks a price, a SKU or a stock count in WooCommerce, the gap shows up at the counter. Two details from the WooCommerce documentation matter most here:
- A variation without a regular price does not show in the store.
- If you set a SKU on the parent product and leave it blank on a variation, the variation uses the parent’s SKU. The same rule applies to the GTIN field.
The second point causes many barcode problems. If six variations inherit one SKU, they share one identifier, and a label built from that SKU cannot tell them apart.
What Goes Wrong With Product Variations in POS
Most stores notice the problem through its symptoms rather than its cause. These are the ones that show up most often:
- The scanner adds a different size or color from the one in the customer’s hand.
- One size shows as available while the shelf is empty, or a size goes negative.
- Cashiers type a product name and scroll through a long list because scanning does not work.
- Online stock and in-store stock disagree for the same item.
- A returned item goes back into stock under the wrong size.
Why It Happens: Common Causes
- Blank variation SKUs. When nobody takes the time to assign a SKU to each product variation, the variations inherit the parent SKU, so they are not unique.
- Stock managed at the parent level. WooCommerce lets all variations share one stock count. That suits a product with a physical item and a digital download. It does not suit shirts in different sizes.
- “Any attribute” variations. The WooCommerce documentation warns that variations defined with “Any {attribute}” can behave like duplicates, and it recommends defining all attributes on all variations.
- Attributes edited after variations were created. The documentation notes that you may need to redefine the variations after changing attributes.
- Inconsistent SKUs. Imports, manual entry and several staff members creating products produce different naming styles and the occasional duplicate.
- An empty barcode source. If the POS reads the barcode from a field that is blank on some variations, those variations cannot be scanned.
How to Diagnose Variation Problems
To diagnose problems with product variations in POS, check one problem product at a time. Open the variable product in WooCommerce, go to the Variations tab and compare each row against the table below.
| Symptom | Likely cause | What to check |
|---|---|---|
| Two sizes scan as one item | Shared or inherited SKU | Open each variation and confirm the SKU field is filled and different |
| A size never sells out | Stock managed at parent level | Check whether “Manage stock?” is ticked on each variation |
| A variation is missing in the POS | No regular price, or variation disabled | Confirm the variation is enabled and has a regular price |
| Prices or stock look random on one product | “Any attribute” duplicates | Replace “Any” rows with fully defined combinations |
| Barcode will not scan at all | Empty barcode source field | Compare the barcode source setting in the POS with the variation data |
Export or review the full catalog after the first product. If the same cause appears on one product, it usually appears on others created the same way.
Solution 1: Build a Clean Variation Structure
Product variations in POS depend on how the WooCommerce attribute system is used, so use it the way it was designed. The steps below show how to set up WooCommerce product variations. They follow the WooCommerce documentation and add a few practical choices.
- Create the product and choose “Variable product” in the Product data menu.
- Add attributes in the Attributes tab. Use global attributes (such as Size and Color) for options you reuse across many products. Use custom attributes only for one-off options.
- Tick “Used for variations” for each attribute that creates a sellable option, then save the attributes.
- In the Variations tab, choose “Generate variations” to create every combination, or “Add manually” if you do not stock every combination.
- Delete or disable combinations you do not sell. A variation that does not exist cannot be sold by mistake.
- Fill in each row: regular price, SKU, and stock quantity with “Manage stock?” ticked.
- Use “Bulk actions” to set common values, such as one price for all sizes, then adjust the exceptions.
Keep in mind that WooCommerce changes how product page dropdowns work once a product has more than 30 variations. The dropdowns become static and show every option instead of updating after each choice. That affects your online shop rather than the register, but it is a reason to split very large products into smaller ones, for example one product per fabric type.

Solution 2: Assign a SKU to Each Product Variation
The simplest way to assign a SKU to each product variation is to build it from the product, the color and the size. A readable pattern lets a cashier check a label by eye and lets a manager spot a typo in a spreadsheet.
| Product | Color | Size | SKU |
|---|---|---|---|
| Cotton T-Shirt | Black | M | TS-BLK-M |
| Cotton T-Shirt | Black | L | TS-BLK-L |
| Cotton T-Shirt | Navy | M | TS-NVY-M |
| Denim Jacket | Indigo | L | DJ-IND-L |
These rules keep the scheme workable over time:
- Use one pattern for every product and write it down.
- Use capital letters and hyphens only. Avoid spaces and special characters, which can cause trouble in barcode printing and imports.
- Never reuse a SKU, even for a discontinued item.
- Keep SKUs short enough to read on a small label.
If you plan to list products on a marketplace or in Google Shopping, a SKU is not enough on its own. Google’s Merchant Center guidance on the GTIN attribute says each product and each variant, such as a different color or size, has its own GTIN. For an in-store-only catalog, an internal SKU is usually sufficient.
Solution 3: Choose the Right Stock Level
WooCommerce lets you manage stock at the product level, at the variation level, or as a mix of both. For clothing and shoes, product variations in POS work best with variation-level stock. Tick “Manage stock?” on each variation and enter the count. When a customer buys a medium, only the medium count falls.
Use product-level stock only when variations draw from the same physical pool. The WooCommerce documentation gives the example of a physical product sold with or without a digital download.
POS inventory management adds a second question: where is the stock? A store with more than one outlet needs counts per location. Vitepos lists two stock modes in its change log: the default WooCommerce-based stock, and outlet-wise stock that does not depend on WooCommerce. Pick the mode before you enter opening counts, because changing it later means recounting. The Vitepos stock management guide explains the settings.
How Vitepos Handles Product Variations in POS
Vitepos is a POS plugin built for WooCommerce, so it works from the product data you already keep there. Several documented details are relevant to variations:
- The change log for version 3.0.1 lists search by SKU in the product filter, which helps when a cashier needs to find one variation quickly.
- Version 3.0.4 lists a fix for WooCommerce single stock on variation products.
- Version 3.0.0 lists fixes for parent products appearing in the add stock modal and in barcode generation. The practical reading is that stock and labels are meant to be handled per sellable item, not per parent. Confirm this on your own version by searching for a variable product in the barcode screen.
- Vitepos supports multiple outlets, and its Check All Outlet Stock guide covers viewing stock across locations.
For adding products from the register, see the Vitepos guide to adding products. If most of your catalog already lives in WooCommerce, prepare variations there first and use the POS to sell and adjust them.
Step-by-Step: Prepare a Variable Product for the POS
- Open the variable product in WooCommerce and confirm every sellable combination is a separate, enabled variation.
- Confirm each variation has a regular price.
- Assign a SKU to each product variation using your naming pattern, and check that no two SKUs match.
- Tick “Manage stock?” on each variation and enter the real count from a shelf check.
- Save, then search for the product in the POS by SKU and confirm each variation appears once with the correct price.
- Sell one test item and check that only that variation’s stock changed.
Doing this for a handful of products first lets you catch problems with product variations in POS before you commit to the whole catalog.
Part 2: How to Create POS Barcode Labels for Variations
Once each variation has a unique identifier, the next job is getting that identifier onto the product. POS barcode labels do this, and they are where product variations in POS meet the shop floor. The goal is simple: one scan at the counter should add exactly one variation to the cart, with the right price. This section explains how to print barcode labels for product variations so each size and color gets its own scannable code.
What a Good Variation Label Contains
When you print barcode labels for product variations, each label needs more than a barcode. Shoppers and staff both look at it, so include:
- The product name.
- The variation attributes in plain words, such as “Black / M”.
- The price.
- The barcode, with the human-readable value printed below it.
- Optionally, the shop name or logo.
The human-readable value matters. When a barcode does not scan, a cashier can type it in. Vitepos lists barcode generation with a logo, shop name and price on its features page. The change log shows that the price text size became adjustable in version 3.0.2, and that the logo and shop name were added to the barcode module in version 3.0.5.
Choose What the Barcode Encodes
A barcode is only a way to print a value that a scanner can read. Before printing anything, decide which value the barcode should carry. In Vitepos, the basic settings documentation says the barcode field can be the product ID, the SKU or a custom field, and that it defaults to the product ID.
| Barcode source | Works well when | Watch out for |
|---|---|---|
| Product ID | You want a value that WooCommerce always creates and never repeats | The number means nothing to a person reading the label |
| SKU | Every variation has a unique, readable SKU | Blank or inherited SKUs produce duplicate barcodes |
| Custom field | You already store supplier or manufacturer barcodes in a field | Any variation with an empty field cannot be scanned |
For most small stores that print their own labels, the SKU is the practical choice, provided the SKU rules from the previous section are followed. If you already have manufacturer barcodes on incoming stock, a custom field lets you keep them. Whichever source you choose, apply it to every product. Mixed sources are a common reason scans work on some items and fail on others.
One limit is worth knowing. A user on the plugin’s WordPress.org page asked whether the built-in WooCommerce GTIN, UPC, EAN or ISBN field can be used as the barcode source. The documented options are the three above, so if you want to use the GTIN field, ask the Vitepos support team before you plan around it.
How to Print Barcode Labels for Product Variations in Vitepos
The Vitepos barcode management guide describes the process in four moves: pick the products, set how many barcodes you want for each, choose the paper size, and print. Applied to variations, the routine looks like this.
- Check the data first. Confirm each variation has a unique SKU, price and stock count. Printing before fixing data creates labels you will have to throw away.
- Open the barcode module in the Vitepos panel.
- Select the variations. You can select several products at once. Choose the specific variations you have in stock, not only the parent.
- Set the quantity per variation. Match the number of units you received. If you received 10 medium shirts and 6 large, print 10 and 6.
- Choose the paper size that matches your label sheets or roll.
- Print one label first. Scan it with the scanner or phone you use at the counter. Check that it opens the right variation.
- Print the full batch only after the test scan works.
For barcode label printing, Vitepos states on its FAQ that it supports all kinds of printers, as long as the device and browser support them. If printing fails, the FAQ suggests checking the printer connection and driver and then consulting the printer vendor’s documentation.

Customize the Label Page
POS barcode labels fail when the printed size does not match the physical sheet. Vitepos describes a custom barcode page with settings for barcode or QR code, page title, page height and width, margin and padding, font size, barcode container size, barcode width and height, and page breaks. These settings make barcode label printing easier to fit to the label stock you actually bought.
Some barcode options appear as paid-plan features in third-party listings of the plugin, and the Vitepos site describes its free and paid versions separately. Check the pricing page to confirm which barcode features your plan includes. The Custom Barcodes Setup guide covers the page settings in more detail.
Scanning: Choosing a Barcode Scanner for Size and Color Variations
Labels are only useful if they scan quickly. Vitepos supports both a connected barcode scanner and the camera on a phone or tablet, so a store does not need to buy a scanner on day one. The change log lists camera use on large and mobile screens in version 3.0.1, along with scanner support on the product and stock modules. That second detail is useful for stock takes, where you can scan items instead of typing names.
For a barcode scanner for size and color variations, pick one that reads the barcode type you print. Most retail scanners read common formats such as Code 128 and EAN-13. Check the scanner’s manual for supported formats rather than assuming. Camera scanning works well in good light but can be slower than a handheld scanner when a store sells many items per hour.

Label Quality Checks
Run these checks for barcode label printing whenever you change label stock, printer or settings:
- Scale. Print at 100 percent. Browser or printer scaling shrinks barcodes and can make them unreadable.
- Contrast. Use black bars on a white or very light background.
- Space around the code. Leave a blank margin on both sides of the barcode so the scanner can find where it starts and ends.
- Placement. Stick labels on flat areas. A label across a seam or a curved edge is hard to scan.
- Test scan. Scan one label for each new product before attaching the rest.
- Replace damaged labels. A scuffed label should be reprinted rather than typed in each time.
These are general practices for printed barcodes, not Vitepos-specific settings, so adjust them to your scanner and label stock.
Part 3: How to Handle POS Returns and Refunds Without Breaking Stock
Why Returns Damage Stock and Cash Records
A return changes three records at the same moment: the money paid back, the stock count and the order history. When a store handles returns by hand, those three records are updated at different times and sometimes not at all. Typical results are a cash drawer that is short by the refund amount, a size that shows more stock than the shelf holds, and an order that still looks fully sold.
Product variations in POS make this worse. A return of “Black / M” that is restocked as “Black / L” leaves both counts wrong, and the error repeats at the next stock take. If you want to handle returns in a point of sale system reliably, the refund has to be tied to the exact variation on the original order.
Decide the Return Rules Before the First Return
Software cannot settle policy questions for POS returns and refunds at the counter. To handle returns in a point of sale system consistently, every cashier needs the same answers. Write them down and keep them near the register:
- How many days after purchase will you accept a return?
- Is a receipt or order lookup required?
- Which items cannot be returned, such as underwear, sale items or custom orders?
- Does the customer get money back, store credit or an exchange?
- Who can approve a refund: any cashier, or only a manager?
- Where do returned items go if they are damaged or opened?
Check your local consumer rules for minimum refund rights, since they differ between countries and regions. This article does not cover legal requirements.
How Vitepos Handles POS Returns and Refunds
Vitepos added order refund and return in version 2.0.2, according to its change log. The features page describes it as full or partial refunds for one or more items from a completed transaction. It also says that when a refund is made, the system updates the quantity of the returned products and the cash drawer log. A partial refund at point of sale is useful when a customer returns one item from an order that had several.
The change log adds more detail about how the feature has developed:
- Version 3.0.1 lists a fix for re-stocking when a refund is made from WooCommerce, if stock mode is enabled.
- Version 3.2.2 lists fixes for refund processing and for automatic re-stocking after a refund.
- Version 3.4.3, dated March 16, 2026, lists a refund option inside each order’s detail view.
The two re-stocking entries are a reminder to check your stock settings. The 3.0.1 entry says re-stocking depends on stock mode being enabled, so confirm that setting before you rely on automatic quantity updates. Also, always run a test refund after updating the plugin.
Two more Vitepos features help with finding the original order. The features page says order invoices can carry a barcode or QR code in the header or footer, and that scanning it retrieves the order. The Manage Orders guide describes filters for outlet, processed-by user, order date and date range, plus a Details button that can download the order as a PDF. Vitepos also publishes a video on order return and refund on its videos page, and a written guide in its Order Return and Refund documentation. Use those for the exact screens in your version, since menus change between releases.
If your policy limits refunds to managers, look at the role access panel. Vitepos says its role settings control individual operations, so check whether the refund action is listed there. The role settings guide explains how roles work.
Step-by-Step: Process a Return at the Counter
The steps below describe a safe sequence to handle returns in a point of sale system. Steps that depend on the software refer to the Vitepos features above. Check the Vitepos documentation for the exact buttons.
- Find the original order. Scan the barcode or QR code on the receipt if you print one, or search the order list by date, outlet or cashier.
- Match the item to the order. Compare the label on the returned item with the variation on the order. Confirm size and color, not only the product name.
- Inspect the item. Decide whether it can be resold, needs repair or is damaged. Do this before the refund, not after.
- Choose full or partial refund. If the order had several items and the customer returns one, use the partial option. A partial refund at point of sale should list only the returned items and quantities.
- Select the returned variation and quantity. Do not select the parent product or a similar-looking size.
- Pay the refund using the method your policy allows.
- Check the stock result. Open the variation’s stock count. If the item is resellable, the count should have risen by the returned quantity. If it is damaged, adjust stock according to your own process.
- Record the reason. A short note such as “wrong size” or “faulty zipper” helps later when you review which products come back most often.

Return Cases That Need Extra Care With Variations
Wrong size returned. A customer sometimes brings back a different size from the one on the order. Refund the item that was sold, and treat the extra item as a separate stock correction, not as part of the refund.
Exchanges. The cleanest approach is to refund the returned item, using a partial refund at point of sale if the order had other items, and ring up the new item as a new sale. This keeps both stock counts correct. If the new item costs more or less, the difference shows up in the new sale.
Damaged or opened items. Do not restock these. Keep them in a separate place and adjust stock using your normal process so they do not reappear as available.
Returns across outlets. If you have several outlets, decide whether a return can be made at an outlet other than the one that made the sale. Stock per outlet needs a clear rule, so the returned item ends up in the right location. The Vitepos release notes for version 3.1.0, as listed on its AppSumo page, mention fixes for refund issues in multi-outlet environments, which is another reason to test this case in your own setup before relying on it.
Online orders. Vitepos shows online orders in the POS order list, and its plugin description says POS orders are stored in WooCommerce with full details. If a customer bought online and returns in store, check which record you refund against and make sure the refund is not issued twice, once in the shop and once in WooCommerce.
Reconcile Returns at the End of the Day
POS returns and refunds are the transactions most likely to go wrong, so review them daily. At close:
- Filter the order list for the day and check that every refund, including each partial refund at point of sale, has a matching original order.
- Compare the refund total with the cash drawer log.
- Pick two returned variations and compare the system stock count with a physical count.
- Move resellable returns back to the shelf and tag damaged ones.
A two-item physical check takes a few minutes and is a small but effective part of POS inventory management, because it catches wrong-variation restocks while they are still easy to trace.
Where Vitepos Fits in This Workflow
Vitepos does not replace the work of cleaning up your variation data. It gives you tools to carry product variations in POS through labels, checkout and returns. The table below maps each task to the documented feature. It is a summary of the sections above, not a full feature list.
| Task | Vitepos feature | Where it is documented |
|---|---|---|
| Find a variation fast | Search by SKU in the product filter (3.0.1) | Change log |
| Choose the barcode value | Barcode field: product ID, SKU or custom field | Basic settings |
| Print labels | Barcode module with quantity per product, paper size and print | Manage Barcodes |
| Fit labels to your stock | Custom barcode page settings | Custom Barcodes Setup |
| Scan at checkout | Scanner or phone camera | Features |
| Look up a past sale | Barcode or QR code on the invoice; order filters | Manage Orders |
| Refund and return | Full and partial refund with quantity and drawer log update | Order Return and Refund |
| Track stock by location | Outlet stock and stock management settings | Stock Management |
Vitepos Lite is listed on WordPress.org, and the Vitepos site offers paid plans. Features differ between them, so review the pricing page and compare it with your needs. If you are still choosing between systems, the WooCommerce POS buying guide for small retail businesses lists the questions to ask, including hardware compatibility.
A Weekly Routine for Product Variations in POS
Clean data stays clean only if someone checks it. This routine keeps product variations in POS accurate and takes about thirty minutes for a small store.
| When | Task | Why |
|---|---|---|
| Every new delivery | Check SKUs and stock on new variations, then print barcode labels for product variations and test-scan one | Prevents duplicate or unscannable items from entering the shop floor |
| Daily at close | Review POS returns and refunds against the cash drawer log | Catches missing or double refunds |
| Weekly | Count five fast-selling variations by hand and compare with the system, as a basic POS inventory management check | Finds stock drift early |
| Weekly | Search WooCommerce product variations with no SKU or no price | Stops blank fields from reaching the register |
| Monthly | Review returns by product and reason | Shows sizing or quality problems |
Common Mistakes to Avoid
These mistakes come up most often when a store sets up product variations in POS for the first time.
- Leaving variation SKUs blank. This makes variations share the parent SKU and breaks scanning.
- Printing POS barcode labels for the parent product. Labels should identify the specific size and color.
- Mixing barcode sources. Some items use the SKU, others the product ID, and nobody remembers which.
- Skipping the test scan. A full batch printed at the wrong scale wastes the whole barcode label printing run.
- Buying hardware before checking formats. A barcode scanner for size and color variations must read the barcode type you print, so check the supported formats first.
- Using “Any attribute” variations without a plan. WooCommerce itself recommends defining all attributes on all variations.
- Managing stock at the parent level for sized goods. One shared count hides which size is missing.
- Restocking damaged returns. Damaged items return to the sellable count and are sold again.
- Refunding without the original order. A refund that is not tied to an order cannot be matched to a variation later.
- Not testing after updates. Refund and stock behavior has changed across Vitepos releases, so run one test return after each update.
When You May Need Technical or Professional Help
Most stores can complete everything above on their own. Some situations call for outside help:
- Large catalogs. Cleaning hundreds of WooCommerce product variations with missing SKUs is easier with a CSV import or export. WooCommerce supports product CSV import and export, and a developer or experienced administrator can build the file safely.
- Custom barcode sources. If your barcodes live in a field that Vitepos does not read, or you want the WooCommerce GTIN field to act as the barcode, ask the plugin’s support team first. A developer may be needed if a custom solution is required.
- Printing problems. If barcode label printing produces misaligned or blank labels, start with printer drivers and connections, then contact the printer vendor.
- Multi-outlet stock rules. Stock transfers and returns across locations are worth testing with the plugin’s support team before you go live.
- Tax and legal questions. Refund rules and tax treatment on returns vary by location. An accountant or local advisor is the right source.
Additional Tips
- Keep a short written guide for product variations in POS, including how to assign a SKU to each product variation, on the shared drive and in the stockroom.
- Take a backup of the site before bulk-editing WooCommerce product variations.
- Train every cashier on the return steps with a practice order. Ten minutes of practice beats a policy document nobody reads.
- Keep a small stock of blank labels and a spare marker for the day the printer fails.
- Review the Vitepos change log before each update, since refund and barcode behavior has changed between versions.
- Scan during stock takes to keep POS inventory management accurate. The change log lists scanner support on the product and stock modules, which cuts typing errors.
- Pick a barcode scanner for size and color variations that reads the barcode type you print, and keep a spare in case of failure.
Give each variation its own SKU and its own stock count in WooCommerce, with “Manage stock?” ticked at the variation level. Avoid “Any attribute” variations, and avoid a shared parent-level count unless the variations really draw from the same physical pool. Then check that each variation appears once in the POS, which is the base of reliable POS inventory management.
Per variation, because product variations in POS are sold and stocked one by one. A label for the parent cannot say which size or color the customer is holding, so the scan cannot update the correct stock count. When you print barcode labels for product variations, select each size and color you stock and set the number of labels to match the units received.
Either works if the value is unique for each variation. Vitepos lets you choose the product ID, the SKU or a custom field, and it defaults to the product ID. The SKU is easier to read on a label, so many small stores choose it, as long as no variation has a blank or inherited SKU.
Only if you list products on marketplaces or shopping feeds that require it. Google’s Merchant Center guidance says each product and variant has its own GTIN. For items sold only in your own store, an internal SKU is usually enough.
Vitepos documents camera scanning on phones and tablets as well as support for a connected scanner. A handheld scanner is usually faster at a busy counter, but the camera option lets a small shop start without extra hardware.
Open the original order, choose the partial option, select only the returned variation and quantity, and complete the refund. Vitepos describes full and partial refunds that update the returned quantity and the cash drawer log. Follow the Order Return and Refund guide for the exact screens in your version.
Conclusion
Product variations in POS stay accurate when each variation has a unique SKU, its own price and its own stock count. Labels then carry that SKU into the shop, and the same identifier lets a return find the exact item that was sold. When one of those links is weak, the symptoms appear at the register: wrong scans, stock drift and refunds that restock the wrong size.
Start small. Fix the product variations in POS for a handful of products, print POS barcode labels for them and test-scan one, then run one practice return and check the stock result. The way you handle returns in a point of sale system should be tested like this before real customers depend on it. Once that cycle works, repeat it across the catalog and keep the weekly routine. If you use Vitepos, the documentation pages linked above explain each screen in detail, and its support team can answer questions about features that your plan or version may handle differently.
Subscribe
To get news about new releases, Updates, Blog Post, Deals and Discounts

